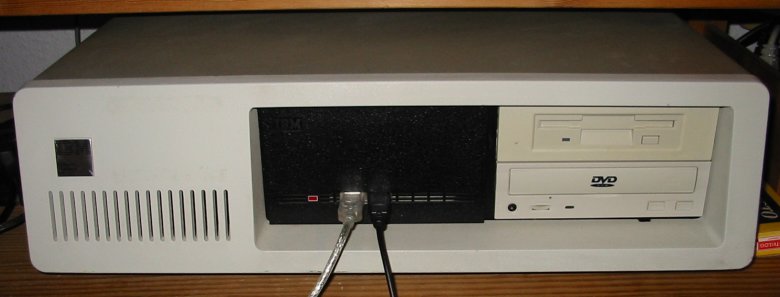
First of all, it's not easy, but using appropriate tools, it is possible. The main problem is that the newer Baby AT mainboards do not fit into an IBM XT case so you have to saw, drill, bend, and rasp. At least, it's possible as you will see here.
But be very careful! Make sure you never leave any metal splinters or other small metal particles in any part of the case before mounting any other part to the case or even switch on power!
Of course, all you do is on your own risk. The information contained in these 4 pages is just meant to assist you with your work.
I will not be held responsible for any damage, consequential, incidental, indirect or direct damages that may occur during your attempts to build your own 1 GHz IBM XT. Keep in mind that it is even possible that I forgot to mention important build or test steps in these web pages.
All trademarks used are properties of the respective owners.
Before using pictures or large text areas
of these pages for your own pages, please send me an email.
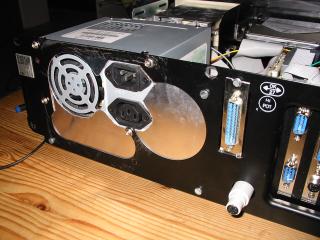
To fix the new plate, I used three 3 mm nuts and bolts. The upper left edge is fixed using the screw for the upper left edge of the power supply.
For the power button, I used a small round button which you can get in electronics shops. I drilled the appropriate hole into the IBM XT case's front so that I could reach the button also after attaching the XT case cover. However, using the P2B-B's keyboard power on feature, you will probably not need it.
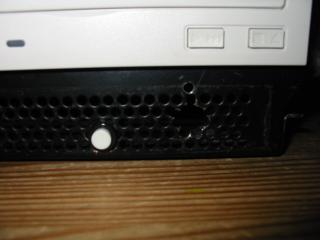
BTW: The other two holes you can see (a big and a small one, right to the white power button) were for an AT-Bus power supply that I previously had used for another motherboard that ran in the XT case for quite a while (Chaintech 586 IFM 1).